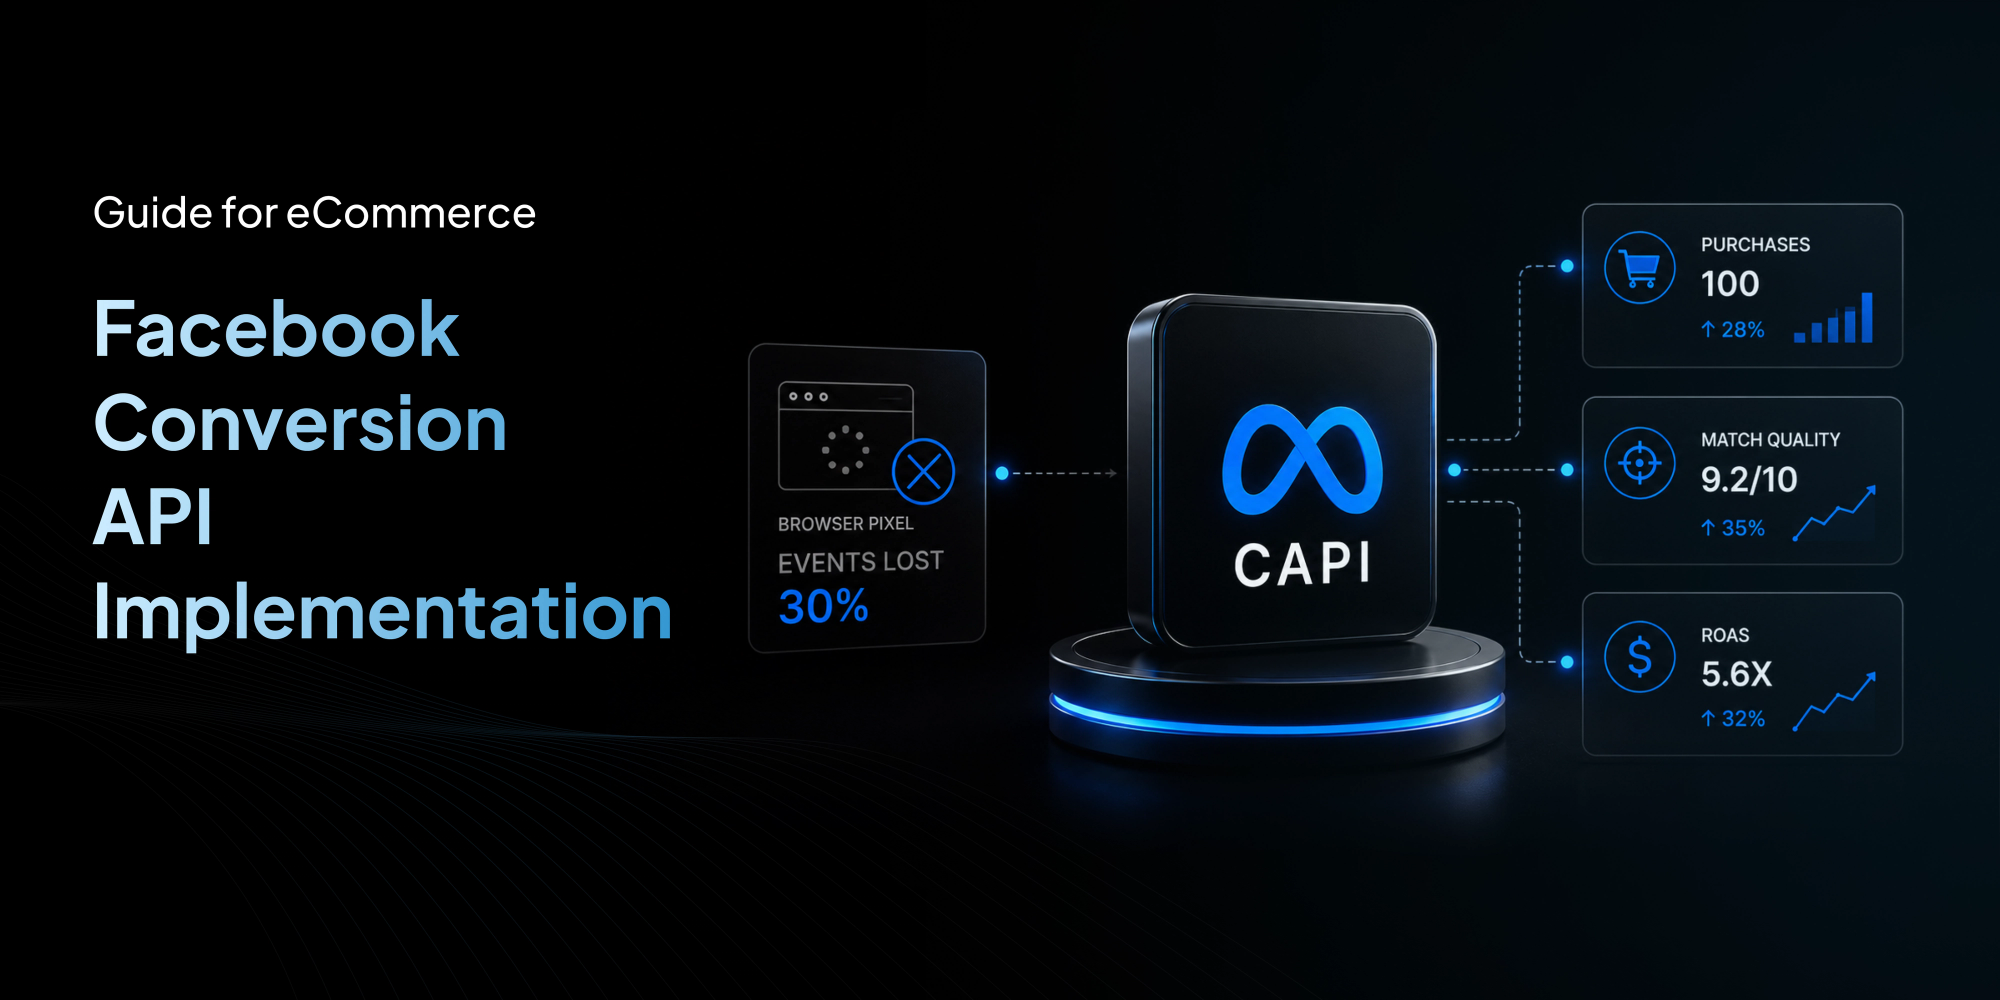
Do you know how many sales your Facebook ads actually drive? Not the number inside your ads manager. The real number.
I work with eCommerce owners every week. When I audit their tracking, I almost always find the same problem. The pixel reports 70 purchases. But your backend order system shows 100. You lost 30 sales in the reporting gap. That means Meta thinks your cost per purchase is 30% higher than reality. So it stops scaling campaigns that are actually profitable.
The fix is Facebook Conversion API. CAPI sends purchase data straight from your server to Meta. No browser blocking. No ad blocker interference. No missing events.
In this guide I will walk you through exactly how to set it up. But more importantly I will show you where most stores mess up and how to avoid those mistakes.
What Is Facebook Conversion API?
Facebook Conversion API, or CAPI, is a server side tool that sends customer actions directly from your eCommerce backend to Meta. Instead of relying on the browser pixel which can be blocked, CAPI uses a direct connection between your server and Meta’s servers.
You send events like Purchase, AddToCart, InitiateCheckout and ViewContent along with customer information like email, phone, and order details. Facebook uses this data to match events to real user profiles, train its algorithm, and optimize your ad delivery.
Think of CAPI as a private line between your store and Meta. No browser can cut that line.
Why Accurate Tracking Directly Improves Ad Delivery
Most store owners do not realize that tracking quality is directly tied to ad performance. This is the profit connection.
Meta’s algorithm optimizes based on conversion signals. Every time a purchase fires, Meta learns something about the user who bought it. The algorithm builds models of who converts and who does not.
Now imagine 30% of your purchases are missing. Meta trains on incomplete data. It thinks certain audiences do not convert when they actually do. Good audiences get ignored. Budget shifts toward weaker groups.
One Shopify brand we audited was missing 28% of purchases due to Safari browser restrictions. After implementing server side tracking with proper event deduplication, reported ROAS increased by 34% within 21 days because Meta received cleaner optimization signals.
How Facebook Conversion API Works
Understanding the architecture helps you implement CAPI correctly.
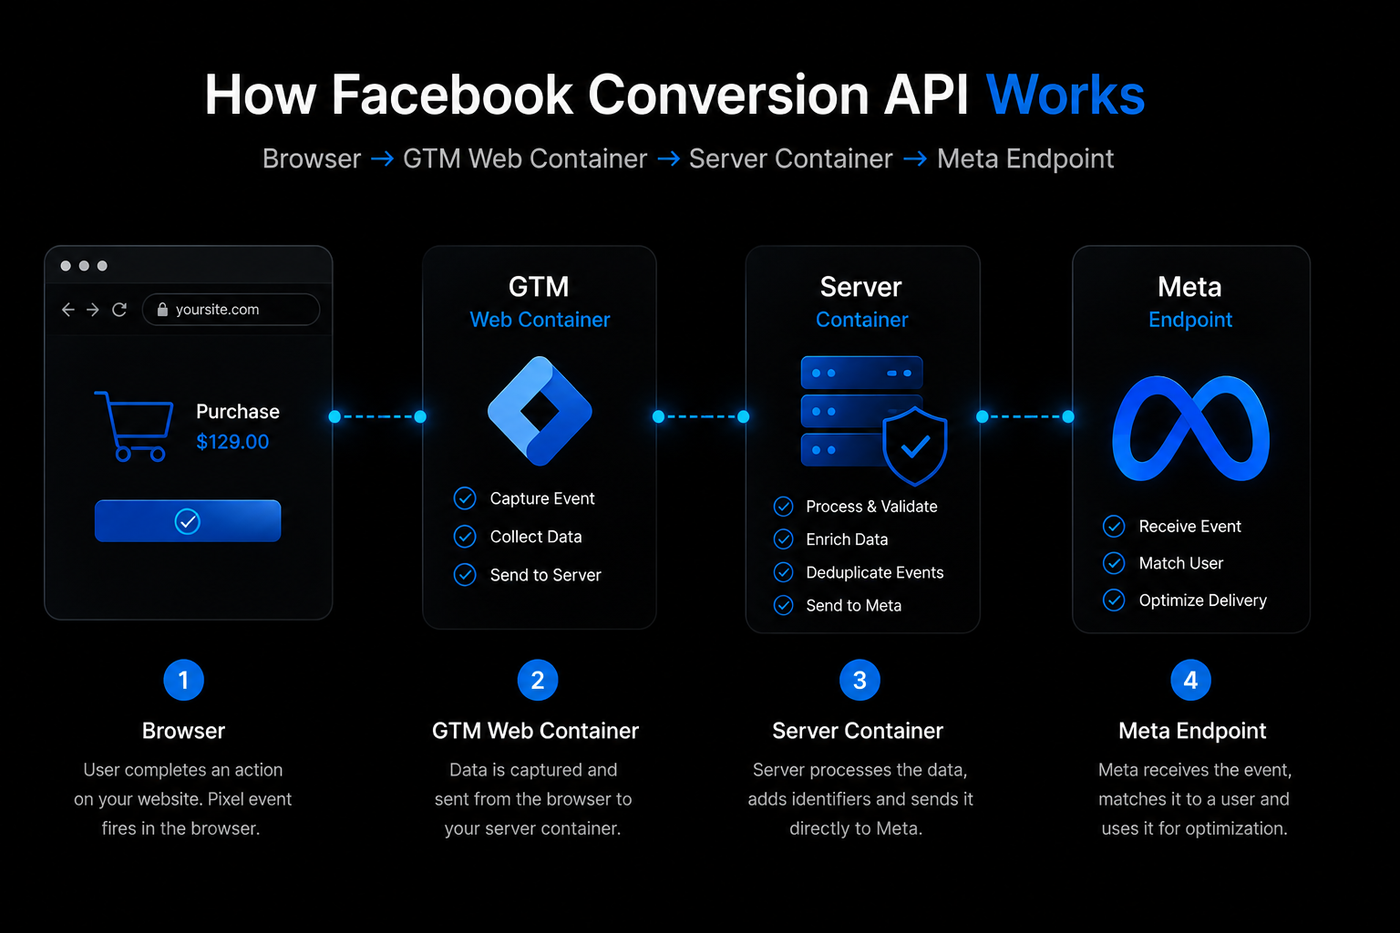
Browser → GTM Web Container → Server Container → Meta Endpoint
Here is how the data flows in a modern hybrid setup.
- A user visits your store. The browser fires a pixel event and also sends data to your web container in Google Tag Manager.
- GTM forwards that data to your server side container, which is hosted on Cloud Run or Stape.
- The server container processes the event. It adds first party cookies, hashes user data, and enriches the payload with browser ID and click ID.
- The server container sends a POST request to Meta’s Graph API endpoint. That is the server request that bypasses all browser restrictions.
- Meta receives the event and matches it against user profiles. At the same time, the pixel event also arrives. Both are compared using the event_id parameter. This is the deduplication layer that prevents double counting.
This browser plus server hybrid model is the gold standard. The browser fires the pixel for real time attribution. The server fires CAPI for guaranteed delivery. Together they create a complete picture.
Facebook Pixel vs Conversion API
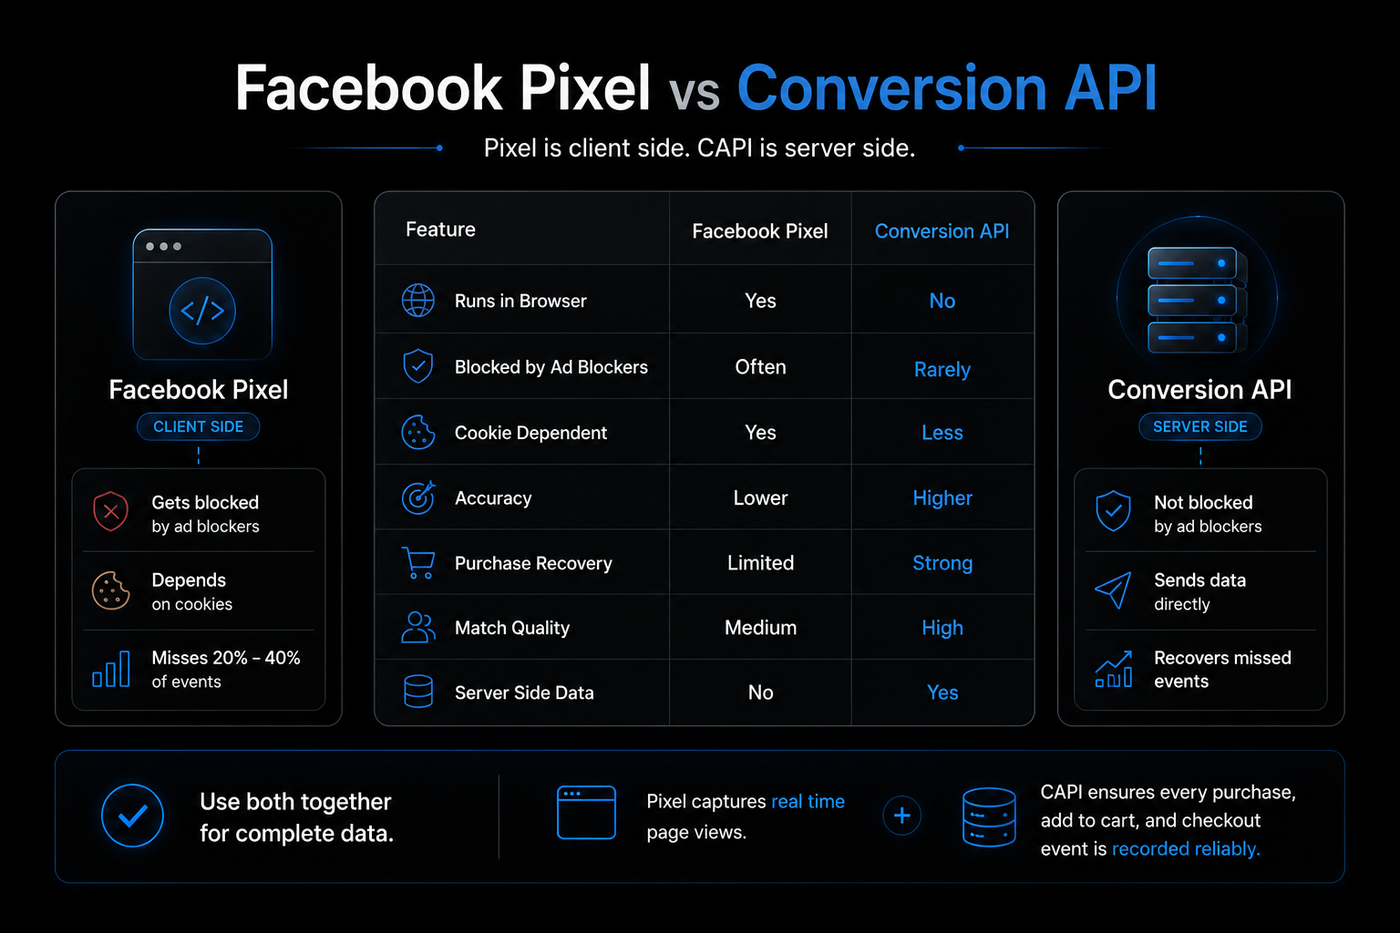
The pixel is client side. CAPI is server side. The pixel gets blocked. CAPI does not. The pixel depends on cookies. CAPI sends data directly. The pixel misses 20% to 40% of events. CAPI recovers them.
| Feature | Facebook Pixel | Conversion API |
|---|---|---|
| Runs in Browser | Yes | No |
| Blocked by Ad Blockers | Often | Rarely |
| Cookie Dependent | Yes | Less |
| Accuracy | Lower | Higher |
| Purchase Recovery | Limited | Strong |
| Match Quality | Medium | High |
| Server Side Data | No | Yes |
Use both together for complete data. Pixel captures real time page views. CAPI ensures every purchase, add to cart, and checkout event is recorded reliably.
How to Install Facebook Conversions API (Step By Step)

You have three options. I will tell you which one fits your situation.
Option 1: Use a Native Plugin (Fastest, But Limited)
If you run Shopify or WooCommerce, this is your quick start.
Shopify: Open your Meta Business Manager and connect the Facebook and Instagram Sales Channel. Then go to Settings and turn on Conversions API. The app handles basic hashing and sending.
WooCommerce: install PixelYourSite or Facebook for WooCommerce. Paste your access token in the Conversion API tab.
What I dislike about this method: Native plugins often miss important parameters like click ID and browser ID. Your match quality stays low. And many plugins do not handle deduplication correctly. You might double count events without realizing it.
Option 2: Use Google Tag Manager Server Side (Best for Most Stores)
This is what I recommend for any store spending over $2000 a month on ads.
Set up a server side GTM container. Install the Facebook CAPI tag template. Configure your access token. Then send event data from your website to the server container.
Hosting your GTM server container on a custom first party subdomain helps preserve cookies longer in Safari and Firefox, improving attribution accuracy and event persistence. You can add a cookie extension to preserve UTM parameters across the customer journey.
Server side GTM also supports Event Data Override for testing and offline conversion syncing. If you use Enhanced Match Quality, you maximize audience size and ad relevance.
Option 3: Direct API Integration (For Custom Code Stores)
If you run a headless store or a custom coded platform, you need to write server code. Send POST requests to Meta’s Graph API with the correct payload structure.
Use any server side language (PHP, Python, Node) to format event data, hash PII, and send to https://graph.facebook.com/v19.0/{pixel_id}/events. You must handle authentication, rate limits, and error logging.
This gives maximum flexibility. But it also creates maintenance overhead. Each time Meta updates the API version, your code may break.
I only recommend this if you have a developer on staff who can monitor it.
The Deduplication Trap That Destroys Your Data
Store owners install CAPI and immediately see conversions jump by 40%. They celebrate. But they are double counting every event. The pixel sends a purchase. The server sends the same purchase. Meta counts it twice.
Now your true conversion rate is hidden inside inflated numbers. You think campaigns perform better than they do. You increase the budget on weak creatives. You waste money. The fix is event deduplication.
For every purchase event, you must send a unique event_id from both the pixel and the CAPI request. That ID could be your order number. When Meta sees the same ID from both sources, it merges them into one event.
Check your deduplication rate in Events Manager under Diagnostics. Aim for a duplicate rate under 5%. If you see higher numbers, review your event_id logic.
Stores with accurate server side tracking often recover lost attribution data that improves Meta bidding efficiency and reveals profitable campaigns previously hidden by incomplete reporting.
How to Get an Event Match Quality Score of 10
Event Match quality is Meta’s rating of how well it can connect your server event to a real person. A score of 8 or above is good. 10 is perfect.
To hit 10, send these parameters with every event:
- em: email hashed with SHA256
- ph: phone number hashed
- fn: first name hashed
- ln: last name hashed
- ct: city
- st: state
- zp: zip code
- client_user_agent: the user’s browser string
- client_ip_address: the user’s IP
- fbc: the Facebook click ID from the URL parameter fbclid
- fbp: the pixel cookie ID
The last three are the ones most plugins ignore. Without click ID and IP, your match quality stays low. You can improve it by capturing those values client side and passing them to your server.
Test your match quality in the Events Manager. Scores above 8 out of 10 are excellent. Below 5 means missing key parameters.
Testing Your Setup Like a Pro
After CAPI is installed, do not assume it works. Test it.
Go to Events Manager > Test Events. Perform a real purchase on your store. Look for the event to appear with a green checkmark.
Click into the event. Verify:
- The event_id matches the pixel event
- Hashed em appears as a string of random characters
- event_source_url shows the thank you page URL
- value and currency match the order total
I also recommend using the Meta Pixel Helper browser extension. It shows you every event that fires on your site in real time. Use it to confirm that the pixel and CAPI are sending identical event_id values.
Consent Mode and Privacy Compliance
Privacy is not optional. If you collect customer data for CAPI, you must follow GDPR, CCPA, and other regulations.
What you need:
- A consent banner on your site that explicitly asks for tracking permission
- A consent management platform that blocks the pixel and CAPI until user agrees
- Server side data hashing: Most implementations hash customer identifiers using SHA256 before transmission for enhanced privacy compliance and secure matching.
- User consent handling: only send events for users who opted in
- First party data usage: your own customer data is cleaner and more compliant than third party cookies
When you handle consent correctly, you build trust with your customers and Meta simultaneously. Non compliance can lead to fines and account restrictions.
Stop Wasting Ad Spend
Every day you delay server side tracking, you feed bad data to Meta. You pay more for customers. You build audiences on broken foundations. You leave money on the table.
We fix tracking setups for eCommerce stores. Our tracking engineers audit your current implementation, install CAPI correctly with full deduplication, optimize match quality, and verify payloads. You get clean data immediately.
Do not wait. Book a free tracking audit today. We will identify what is missing in your setup and give you a clear roadmap to accurate conversions.